A gentle introduction to Docker networking
Fundamentals of docker networking - motivation and bridge networks
· 11 min read
In this post we’re going to go through the very basics of Docker networking including the motivation of networks in docker, default bridge networks and user-defined networks.
This post expects familiarity with Docker basics like Dockerfiles, creating images and running containers.
Introduction #
Our goal is this post would be to containerize a small application and in the process learn about the fundamentals of docker networking.
Let us start with scaffolding our application first.
Suppose we have a node service which uses Redis as a dependency - it connects to Redis on server start up.
Let us start with a simple setup for this node service. Open your terminal and create a project directory and navigate into it:
mkdir node-service
cd node-service
Create a file named package.json and add the following config into it:
{
  "name": "node-service",
  "version": "1.0.0",
  "main": "index.js",
  "scripts": {
    "start": "node ./app.js"
  },
  "type": "module",
  "dependencies": {
    "dotenv": "^17.2.3",
    "express": "^5.2.1",
    "redis": "^5.10.0"
  }
}
Then create a file named app.js and add the following code in it:
import express from "express";
import { createClient } from "redis";
import "dotenv/config";

const app = express();
const host = process.env.SERVER_HOST || "localhost";
const port = process.env.SERVER_PORT || 3000;
const redisHost = process.env.REDIS_HOST || "localhost";
const redisPort = process.env.REDIS_PORT || 6379;

// Initialize Redis client
const redisClient = createClient({
  url: `redis://${redisHost}:${redisPort}`,
});

redisClient.on("error", (err) => console.error("Redis Client Error", err));

async function startServer() {
  try {
    // Connect to Redis
    await redisClient.connect();
    console.log(`Connected to Redis at ${redisHost}:${redisPort}`);

    // Health check API
    app.get("/health", (req, res) => {
      res.json({ status: "OK", message: "Server is running" });
    });

    // Start Express server
    app.listen(port, () => {
      console.log(`Express server is listening at http://${host}:${port}`);
    });
  } catch (err) {
    console.error("Failed to start server:", err);
    process.exit(1);
  }
}

startServer();
The above is a simple code for a service that first connects to a redis instance and then starts an express server.
Then create a .env file and add the following environment variables to it:
SERVER_HOST=localhost
SERVER_PORT=3000

REDIS_HOST=localhost
REDIS_PORT=6379
Then install the dependencies:
npm install
At this point your folder structure should look something like this: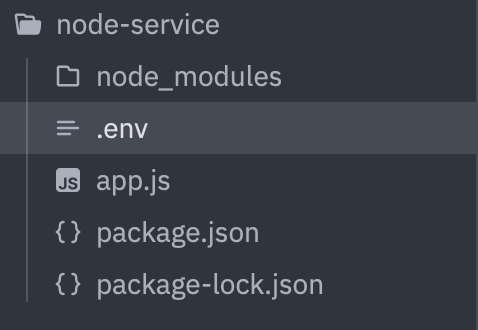
Given you’ve a redis instance running at port 6379 on your machine, executing the following command should start your server:
npm run start
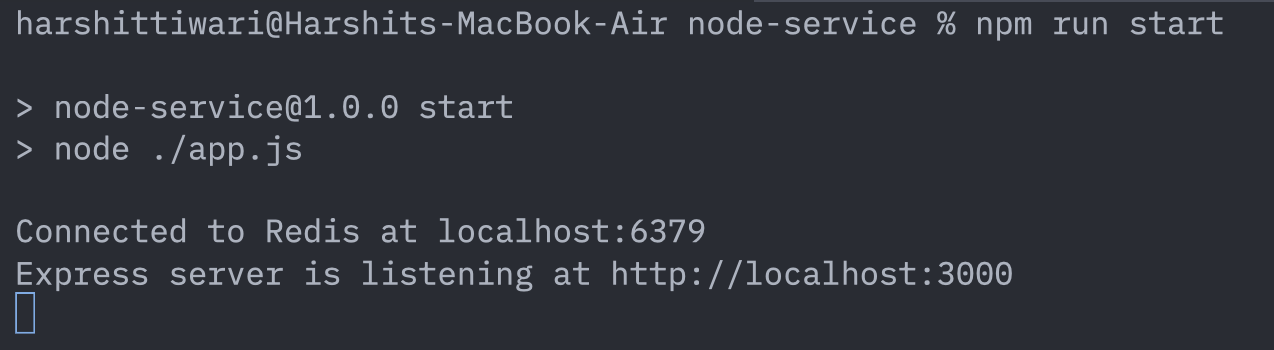
In the image above you can see you have two services running: Redis at localhost:6379 and the node server at localhost:3000.
Okay enough setup. Coming to the point, here’s what we want to achieve now: containerize this application that we just wrote.
In other words: run Redis in one container and run the node service in another container. Let us start doing that step by step.
Containerizing the application #
First of all to run the two containers I mentioned, we would need two images: the Redis image and an image for our node service.
Redis image is officially available on the docker hub itself, so we don’t really need to do anything for it.
Now we want to build an image for our Node service. For creating this image we will need a Dockerfile. Add a file named Dockerfile in your project directory and add the following to it:
FROM node:22-alpine

RUN mkdir -p /nodeService/app
WORKDIR /nodeService/app

COPY package*.json ./

RUN npm ci

COPY . .

ENV PORT=3000
EXPOSE 3000

CMD ["npm", "start"]
The above is a simple Dockerfile that describes the steps to build an image for this service.
Run the following command to build the image named my-service using the following command:
docker build . -t my-service:latest
Now we’ll start our containers.
Because the node service establishes a connection to Redis on its start, we first need to have a running Redis instance. For this we’ll run a container based on the Redis image:
docker run --name redis -d redis
This is quite a simple run command: it runs a container named redis and starts the redis process inside it. You can see if the redis container started successfully by executing the following command:
docker ps

Now we want to run the node service based on the image (my-service:latest) that we earlier created. For that we’ll use the following command:
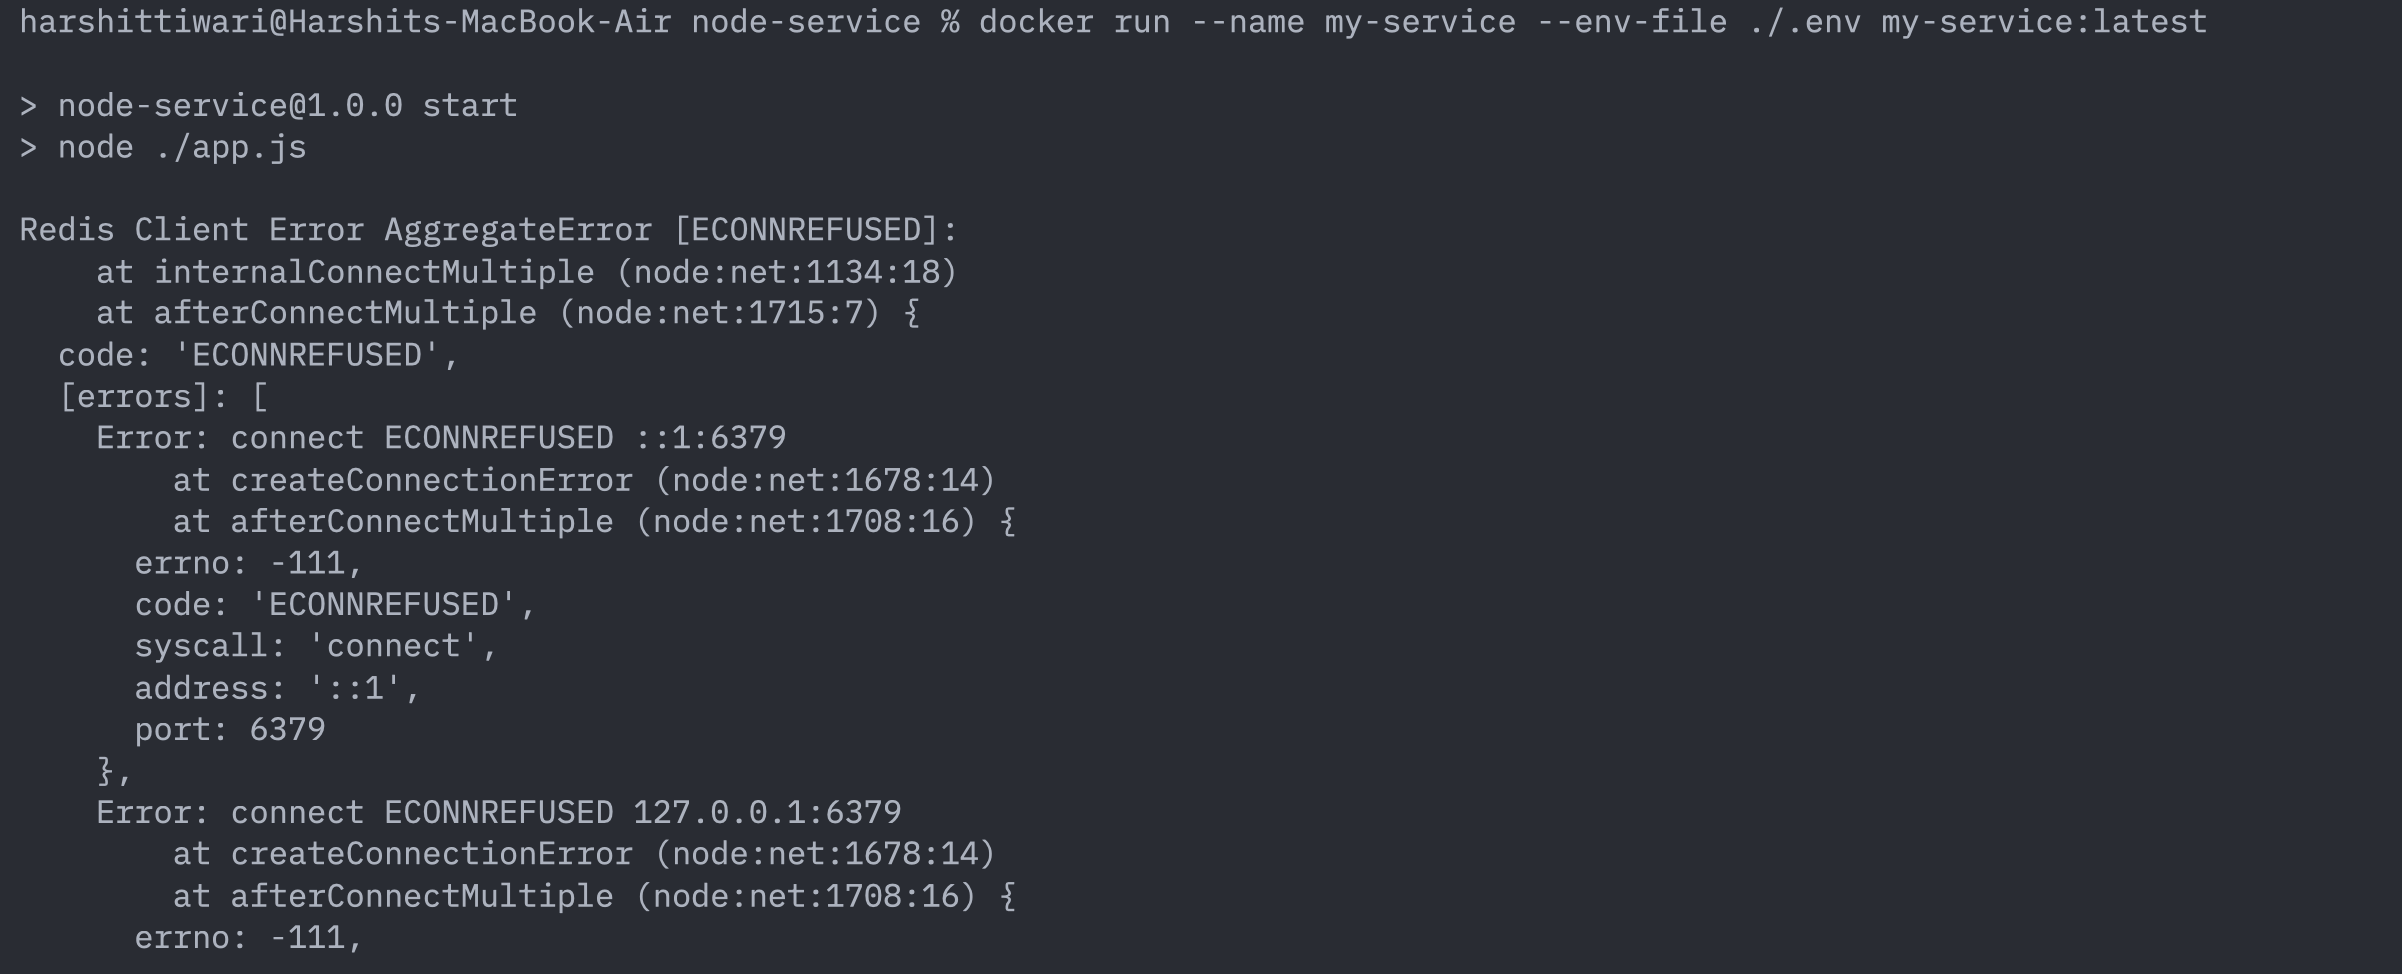
docker run --name my-service --env-file ./.env my-service:latest
This command starts a container named my-service and we’ve also specified the .env file for the container to be able to retrieve the environment variables that it requires.
On running this command you’ll notice that the service will try to start but will not be able to connect to redis with the following connection refused error:
The reason for this is, if you notice in the .env file, you’ll see the REDIS_HOST specified as localhost. So what’s the issue with that? Why can’t we connect?
The reason is pretty simple: From the point of view of a container, localhost refers to the localhost of that container and not the localhost of the host machine.
So when your node app inside the container my-service is trying to connect to localhost:6379, it is actually referring to my-service’s localhost and because there’s no redis process running at port 6379 inside this container, it fails to connect.
Our redis process is actually running inside another container named redis. So that’s the first thing: in our node app, instead of trying to connect to localhost:6379 we need to connect to redis:6379. So we’ll change the REDIS_HOST to redis in the .env file.
Now if you run the command to run the container again:
docker rm my-service
docker run --name my-service --env-file ./.env my-service:latest
The container will again try to connect to redis on startup but will fail again. This time however, the error is a bit different:
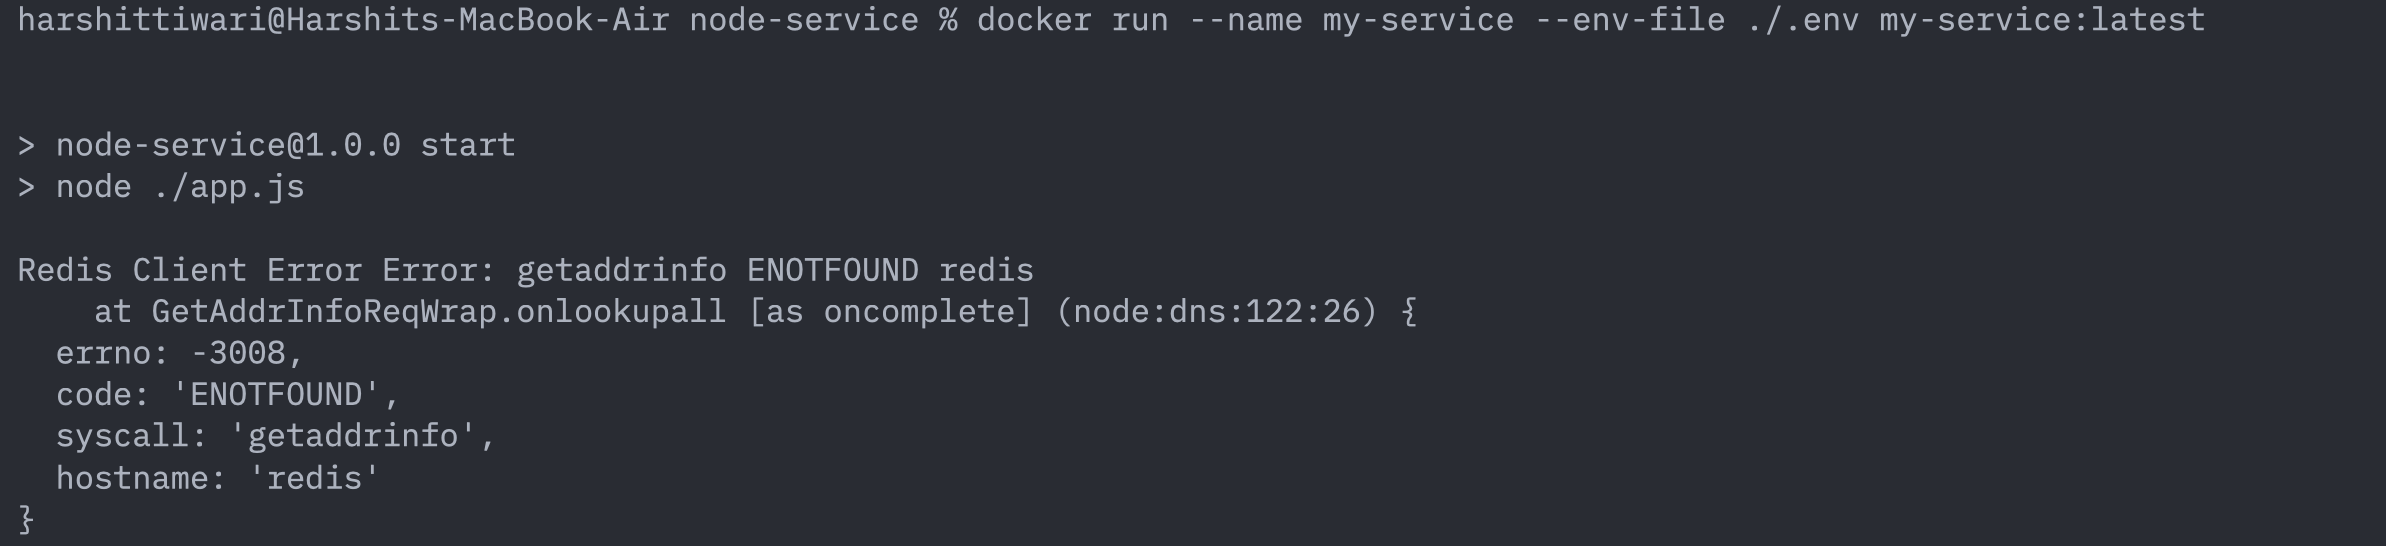
Instead of saying “connection refused” like the last time, this time the error is: “address not found”. Why is that? This is because last time the service knew where to connect to (i.e. localhost:6379) but couldn’t connect to it because there was no redis process running there. This time however, it failed at the first step itself: the service couldn’t even figure out where to connect to. Hence the address not found error.
What is happening? We can’t seem to connect the two containers anyhow. Why is that? Well the answer is networking. Let’s first understand a little bit about how networking inside docker works which will give us insight into what exactly is happening here.
Networking #
When you run a container inside a docker host, it is by default connected to a network knows as the default bridge network.
A bridge network in docker is a network which enables containers inside a host to communicate with each other. All the containers that are connected to the same bridge network will have unrestricted access to each other, but they’ll be isolated from the containers outside this network.
When you start docker, a default bridge network is automatically created and when you run containers, each of those containers are by default connected to this default bridge network. Each container inside this bridge network will be given an IP address from the subnet of this network.
You can see the networks in your host using this command:
docker network ls

The very first network you see in the result above is the default bridge network.
You can see the networks that your containers are connected to by running the command:
docker inspect <container_name>. For example:
docker inspect redis

In the image above you can see the list of networks our redis container is connected to. Currently it shows just one bridge network named bridge which is the default one. We can also see the IP address assigned to this container: 172.17.0.2.
So currently our two containers: my-service and redis are connected to this default bridge network. That means that these two containers should’ve full access to each other. So, in theory our containers should be able to communicate with each other. But that isn’t the case. Why is that?
The thing is that the default bridge network has a few limitations. Let us see the first one which is causing us this issue.
Limitations of default network and workarounds #
The containers inside a default bridge network can communicate with each other by referring them with their IP addresses but cannot recognise each other through their hostnames. This is because there’s no DNS resolution inside the default bridge network.
We can verify this as well.
In the .env file, assign REDIS_HOST to be the IP address of the redis container, i.e. 172.17.0.2. Then run the my-service container again:
docker rm my-service
docker run --name my-service --env-file ./.env my-service:latest

You’ll see that your container runs successfully and your app connects to Redis at: 172.17.0.2:6379.
So connecting via IP addresses works.
The issue with connecting via IP addresses, however, is that these IP addresses that containers are assigned are dynamic and can change on container restart. Therefore it is not reliable and we should use hostnames instead to refer to other containers.
But we did try that earlier when we were trying to connect through the hostname (i.e. redis) and we were not able to connect.
Point to note: Containers in a default bridge network cannot discover each other through their hostnames, only through their IP address.
This is exactly what happened in our case. Although our node app was trying to connect to the correct host: redis:6379, our container my-service doesn’t actually recognise the hostname redis . It only recognises the redis container by it’s IP address. So we need to give this information regarding the container redis’s hostname to our container my-service.
So how do we do that? Answer: by using --link flag in the docker run command. This flag is used to link the containers together through their names so that they can recognize each other.
Change the REDIS_HOST back to redis in the .env file. Then run the following command to run our container:
docker rm my-service
docker run --name my-service --env-file ./.env --link redis:redis my-service:latest
You can see we’ve provided an additional --link command line option in which we’ve specified what container to refer to for the redis host.
Now your container will start successfully and your app will also start and connect to redis successfully:

The docker ps command will also show the two containers running:

So this seems like a happy ending to this topic right? Well no.
See here’s the thing: although this solved our problem, the --link command line option is actually a legacy feature and might get deprecated very soon and so we shouldn’t really be using this. You heard that right.
The fact is that the default bridge network is actually not the recommended way to connect the containers with each other nowadays. The reason for this is like I mentioned earlier - default bridge networks have quite a few limitations. We’ve seen the first one: we’ve to manually link the containers in order for them to be able to discover each other through their hostnames.
Let’s see another limitation: bad isolation.
I previously mentioned: every container inside a bridge network has unrestricted access to all the containers inside that network. Now since every container that we spin up inside our docker host is by default connected to this default network, every container can gain access to every other container. Which is something which we’ll most probably not want most of the times. You would want some containers to have full access to each other while still isolating them from other containers in the host.
But in case of default bridge network because every container is in the same network, there’s no isolation between them whatsoever.
Moreover when we link the containers with each other using the --link flag, all the environment variables are exposed to all the linked containers even if we don’t want them to be.
What can be the solution for this? You can guess it: instead of letting every container getting connected to the default one, create our own bridge networks. These are called the user-defined bridge networks.
User defined bridge networks #
We can create our own bridge network using this command:
docker network create -d bridge my-network
This will create a brand new bridge network named my-network. You can see this network by running: docker network ls:

Now we need to connect our two containers to this network and also remove them from the default one.
You can disconnect the containers from the default network and then connect them directly to my-network all on the fly while the containers are still running or you can stop the containers and run them again by specifying the network to which you want them connected.
Let us go with the 2nd option just for the sake of understanding (although the 1st option is equally valid). So first we’ll stop and remove the containers:
docker stop redis my-service
docker rm redis my-service
Next we’ll start these containers again, but this time we’ll also specify the network through the --network flag:
docker run --name redis --network my-network -d redis

docker run --name my-service --env-file ./.env --network my-network my-service:latest
This will start the two containers and connect them exclusively to the user-defined bridge network my-network. You can verify this by inspecting the containers and checking the list of networks they’re connected to:
docker inspect redis
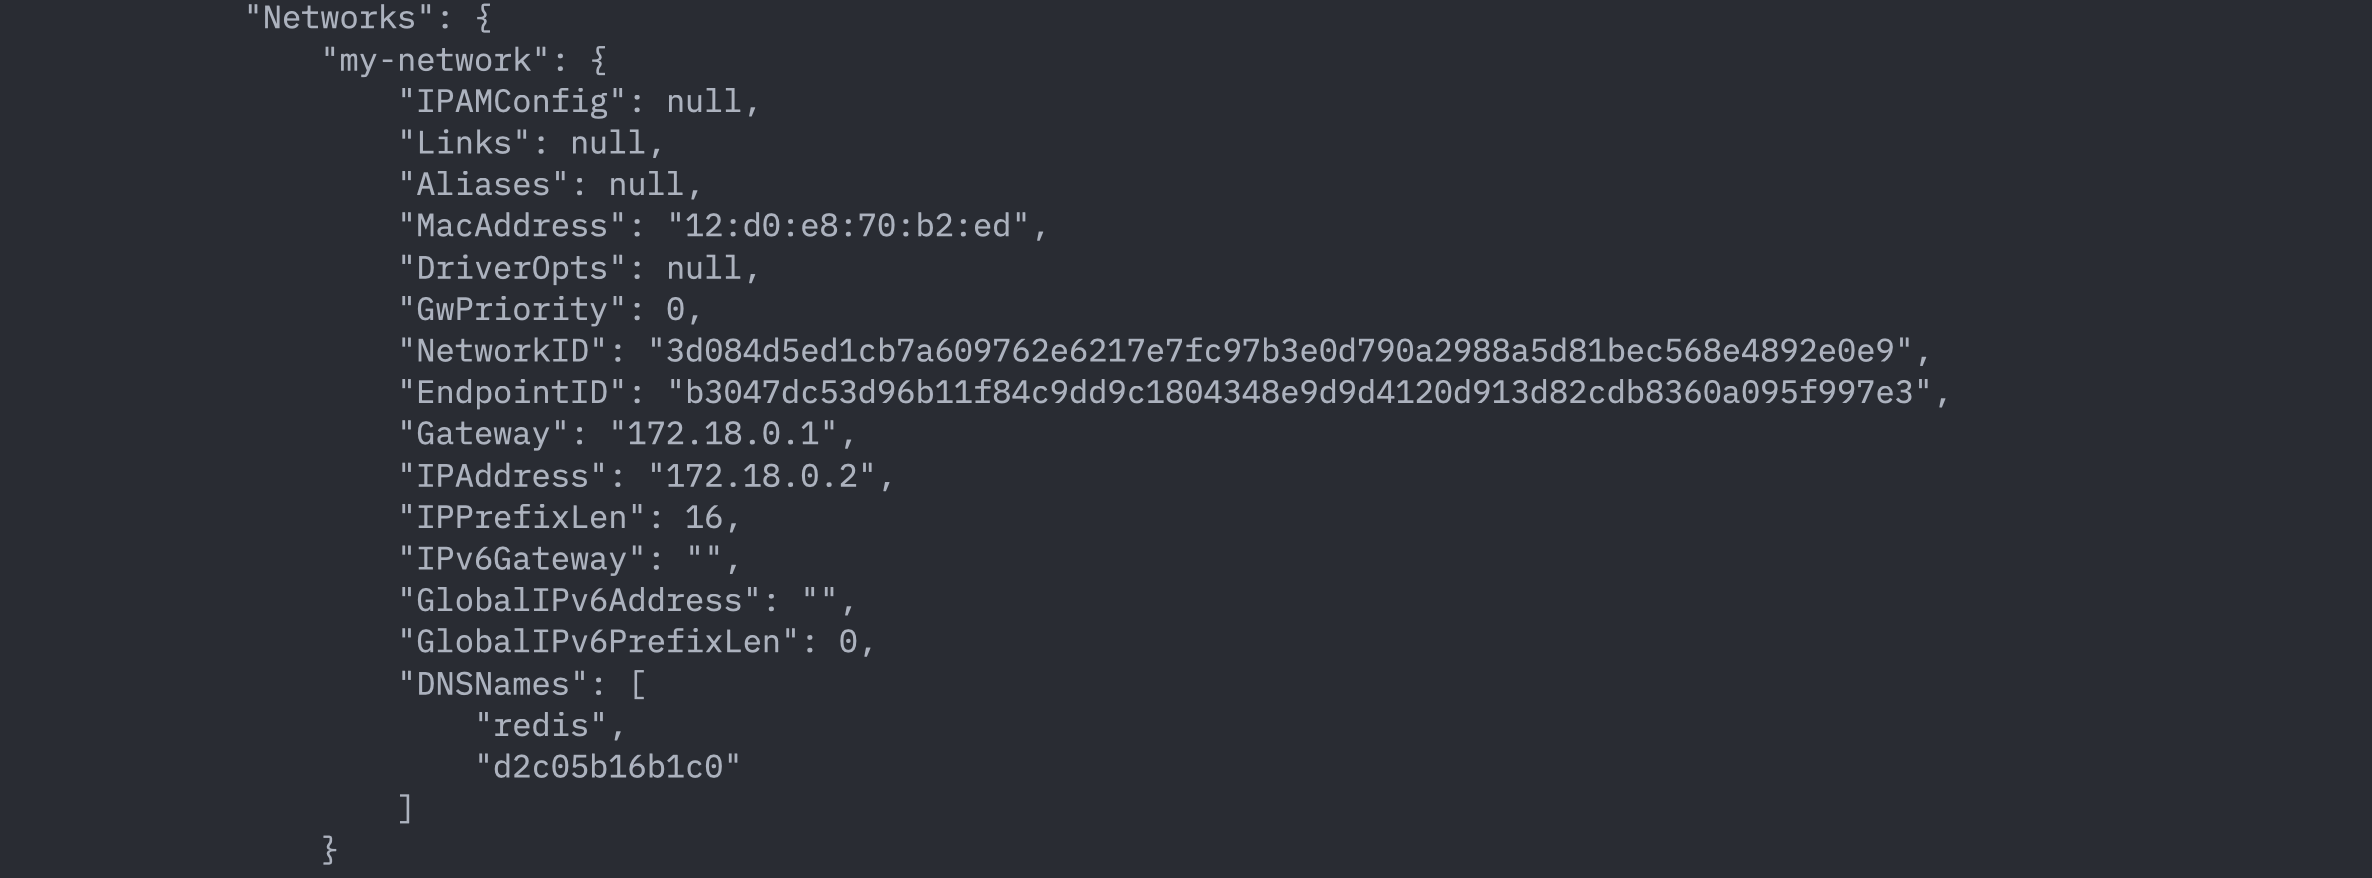
In the networks list above, you can no longer see the default network bridge and only the one that we created my-network.
There are quite a few advantages of user-defined networks:
- User-defined network provides a scoped network in which only containers attached to that network are able to communicate. Containers connected to different user defined bridge networks are isolated from each other.
- User-defined bridge network provides built-in DNS resolution which allows the containers to connect with each other by their names by default. This means unlike in the case of default bridge network where we had to manually link the containers through
--link, here the containers will automatically be able to recognise each other by their hostnames given they’re in the same network.